Add a Partition.
Adding a partition has different side affects for different partition types. For range partitions, a new partition is added at the end mainly to specify a new high-end value. You cannot add a partition if MAXVALUE partition exists. Adding a partition does not not mark a global index unusable. For hash partition or hash subpartition in composite partition, adding a partition will receive rows redistributed from other partitions.
Example
Alter table sales_range
Add partition sales_mar2009 values Less
Than (to_date(‘03/01/2009’,’dd/mm/yyyy’))
Tablespace tsp1;
Alter table q1_sales_by_region
Add partition q1_outerregion values (‘HI’,’PR’)
Tablespace tbsp2;
Drop and Truncate Partition
Dropping a partition will discard the rows quickly, uses few system resources and doesn’t use rollback. Only range and list partitions can be dropped. If a table contains only one partition the partition cannot be dropped. You must drop the table. If range partition, if you want to remove the range key but keep the data then you should merge the partitions and not drop the partition. Only one partition can be dropped at a time. You can truncate a partition to discard the data rows in the partition but not remove the partition. The corresponding local indexes are also truncated. If you truncate the table then it will discard rows from all partitions.
Example
Alter table sales drop partition jan2000;
Alter table sales truncate partition jan2000;
Split, Merge and Coalesce Partition
Splitting a partition will create two new partitions filled with rows of the split partition. Merging a partition collects the rows from two partitions and drops them into one partition. Hash partitions cannot be split or merged. Coalesce is used on hash partitions. It is same as merge on non-hash partitioned tables. Coalescing is also used to reorganize a partition of an IOT table.
Example
Alter table sales_list
Split partition sales_central values (‘texas’) into partition sales_south, sales_southwest;
Alter table sales_range
Split partition sales_jan2009 values less
Than (to_date(‘01/16/2009’,’dd/mm/yyyy’))
Into partition sales_jan2009_1,sales_jan2009_2;
Alter table sales_range
Merge partition sales_jan2009, sales_feb2009 into partition sales_feb2009;
Alter table sales_list
Merge partition sales_east,sales_central into partition sales_central;
Alter table sales_hash coalesce partition;
Move and Rename Partition
Moving a partition is generally used to replace a partition in a new tablespace. In order to move a partitioned table you will have to move all the partitions. Global indexes are marked unusable unless there is no data in the partition that is moved or update global indexes command is used. Renaming a partition is to change name of the partition. There are no restrictions on renaming a partition name as long as the partition name is unique with in the partitioned table or index.
Example
Alter table sales_list move partition sales_east tablespace sales_new;
Alter table sales_list rename partition sales_west to sales_west_north;
Exchange Partition
Exchange partition is to swap names. You can exchange a partition with a non-partitioned table. This operation does not move rows. The non-partitioned table must have the same structure as the partitioned table.
Example
Alter table sales_list
Exchange partition sales_west with sales_west_temp;
DBMS_REDEFINITION package can be used to take a non-partitioned tables and change it to partitioned tables when its is being accessed.
Wednesday, March 18, 2009


Tuesday, March 17, 2009
Table partitioning - II
Range Partitioning
Range Partitioning maps data to partitions based on ranges of partition key values that you establish for each partition. It is the most common type of partitioning and is often used with dates. For example, you might want to partition sales data on a monthly basis. You can also partition by a range of alpha characters.
Example.
Create TABLE sales_range
(salesman_id Number(5),
salesman_name varchar2(30),
sales_amount Number(10),
sales_date Date)
Partition by Range(sales_date)
(
Partition sales_jan2009 values less than (to_date(‘02/01/2009’,’DD/MM/YYYY’)),
Partition sales_feb2009 values less than (to_date(‘03/01/2009’,’DD/MM/YYYY’)),
Partition sales_Mar2009 values less than (to_date(‘04/01/2009’,’DD/MM/YYYY’))
Enable row movement);
Create Table Students (
Student_id Number(6),
Student_fn Varchar2(25),
Student_ln Varchar2(35),
Primary key (student_id))
Partition by range (student_ln)
(partition student_ae Values less that (‘F%’),
partition student_fl Values less that (‘M%’),
partition student_mr Values less that (‘S%’),
partition student_sz Values less that (MAXVALUE)
ENABLE row movement);
Oracle 11g Feature – Interval Partitioning
In the above sales_range example, the DBA has to manually create the new partitions every month to accommodate the the values beyond the range specified. The system automatically creates a new partition ,if the specified values above the specified range for Interval partition.
Example:
Create TABLE sales_range
(salesman_id Number(5),
salesman_name varchar2(30),
sales_amount Number(10),
sales_date Date)
Partition by Range(sales_date)
Interval (numtoyminterval (1,’month’))
(
Partition sales_jan2009 values less than (to_date(‘02/01/2009’,’DD/MM/YYYY’))
);
List Partitioning
List partitioning enables you to control explicitly how rows map to partitions. You do this by specifying a list of discrete values for the partitioning column in the description for each partition. List partitioning allows for partitions to reflect real-world groupings (eg. Business units and regions). It differs from range partition in that the groupings in the list partitioning are not side by side or in a logical range. List partitioning gives us the ability to group together seemingly unrelated data into a specific partition.
Example
Create table sales_list
(salesman_id number(5),
salesman_name varchar2(30),
salesman_state varchar2(20),
sales_amount number(10),
sales_date date )
Partition by list (sales_state)
(
partition sales_west values (‘california’,’hawaii’),
partition sales_east values (‘New York’,’virginia’,’florida’),
partition sales_central values (‘texas’,’illinois’)
partition sales_other values (default)
enable row movement);
Composite Partitioning
There are two types of composite partitioning. They are composite Range-hash partitioning and Composite Range-List Partitioning
Composite Range-hash partitioning is used to range partition first, then use a hashing algorithm to further divide the data into sub partitions within each range partition. It combines both the ease of range partitioning and the benefits of hashing for date placement, striping and parallelism.
Possible usage : Range partition by date of birth then hash partition by name.
Composite range-list partitioning is used to range partition first, the divide the data in to subpartitions within each range partition based on the explicit list you chose. It combines both the ease of range partitioning and the benefits of list partitioning at the sub partition level.
Possible usage :- Range partition by date of birth then list partition by state.
Example
Create table sales_composite
(salesman_id number(5),
salesman_name varchar2(30),
sales_amount number(10),
sales_date date)
Partition by range (sales_date) subpartition by hash (salesman_id)
Subpartition template (
Subpartition sp1 tablespace data1,
Subpartition sp2 tablespace data2,
Subpartition sp3 tablespace data3,
Subpartition sp4 tablespace data4)
(partition sales_jan2009 values less
than (to_date (‘02/01/2009’,’dd/mm/yyyy’))
partition sales_feb2009 values less
than (to_date (‘03/01/2009’,’dd/mm/yyyy’))
partition sales_mar2009 values less
than (to_date (‘04/01/2009’,’dd/mm/yyyy’))
partition sales_apr2009 values less
than (to_date (‘05/01/2009’,’dd/mm/yyyy’))
partition sales_may2009 values less
than (to_date (‘06/01/2009’,’dd/mm/yyyy’))
enable row movement);
Create table bimonthly_regional_sales
(deptno number,
item_no varchar2(20),
txn_date date,
txn_amount number,
state varchar2(2))
Partition by Rnage (txn_date)
Subpartition by list (state)
Subpartition template (
Subpartition east values (‘NY’,’VA’,’FL’) tablespace ts1,
Subpartition west values (‘CA’,’OR’,’HI’) tablespace ts2,
Subpartition CENTRAL values (‘IL’,’TX’,’KS’) tablespace ts3
(Partition janfeb2009 values less than (to_date(‘1-MAR-2009’,’DD-MON-YYYY’)),
Partition marapr2009 values less than (to_date(‘1-MAY-2009’,’DD-MON-YYYY’)),
Partition mayjun2009 values less than (to_date(‘1-JU;-2009’,’DD-MON-YYYY’))
ENABLE ROW MOVEMENT);
Hash Partitioning
Hash Partitioning distributes data by applying a proprietary hashing algorith to the partition key and the assigning the data to the appropriate partition. With hash partitioning you can partition data that may not have any logical ranges. Oracle handles all of the distribution of date once the partition key is identified. Hash partitioning is used to spread data evenly over partitions.
Possible usage: Data has no logical groupings.
Example
Create table sales_hash
(salesman_id number(5),
salesman_name varchar2(30),
sales_amount number(10),
week_no number(2))
partition by hash (salesman_id)
partitions 4
store in (ts1, ts2, ts3, ts4);
In the next post I’ll talk about partitioned table maintenance activities and some guide lines.
Range Partitioning maps data to partitions based on ranges of partition key values that you establish for each partition. It is the most common type of partitioning and is often used with dates. For example, you might want to partition sales data on a monthly basis. You can also partition by a range of alpha characters.
Example.
Create TABLE sales_range
(salesman_id Number(5),
salesman_name varchar2(30),
sales_amount Number(10),
sales_date Date)
Partition by Range(sales_date)
(
Partition sales_jan2009 values less than (to_date(‘02/01/2009’,’DD/MM/YYYY’)),
Partition sales_feb2009 values less than (to_date(‘03/01/2009’,’DD/MM/YYYY’)),
Partition sales_Mar2009 values less than (to_date(‘04/01/2009’,’DD/MM/YYYY’))
Enable row movement);
Create Table Students (
Student_id Number(6),
Student_fn Varchar2(25),
Student_ln Varchar2(35),
Primary key (student_id))
Partition by range (student_ln)
(partition student_ae Values less that (‘F%’),
partition student_fl Values less that (‘M%’),
partition student_mr Values less that (‘S%’),
partition student_sz Values less that (MAXVALUE)
ENABLE row movement);
Oracle 11g Feature – Interval Partitioning
In the above sales_range example, the DBA has to manually create the new partitions every month to accommodate the the values beyond the range specified. The system automatically creates a new partition ,if the specified values above the specified range for Interval partition.
Example:
Create TABLE sales_range
(salesman_id Number(5),
salesman_name varchar2(30),
sales_amount Number(10),
sales_date Date)
Partition by Range(sales_date)
Interval (numtoyminterval (1,’month’))
(
Partition sales_jan2009 values less than (to_date(‘02/01/2009’,’DD/MM/YYYY’))
);
List Partitioning
List partitioning enables you to control explicitly how rows map to partitions. You do this by specifying a list of discrete values for the partitioning column in the description for each partition. List partitioning allows for partitions to reflect real-world groupings (eg. Business units and regions). It differs from range partition in that the groupings in the list partitioning are not side by side or in a logical range. List partitioning gives us the ability to group together seemingly unrelated data into a specific partition.
Example
Create table sales_list
(salesman_id number(5),
salesman_name varchar2(30),
salesman_state varchar2(20),
sales_amount number(10),
sales_date date )
Partition by list (sales_state)
(
partition sales_west values (‘california’,’hawaii’),
partition sales_east values (‘New York’,’virginia’,’florida’),
partition sales_central values (‘texas’,’illinois’)
partition sales_other values (default)
enable row movement);
Composite Partitioning
There are two types of composite partitioning. They are composite Range-hash partitioning and Composite Range-List Partitioning
Composite Range-hash partitioning is used to range partition first, then use a hashing algorithm to further divide the data into sub partitions within each range partition. It combines both the ease of range partitioning and the benefits of hashing for date placement, striping and parallelism.
Possible usage : Range partition by date of birth then hash partition by name.
Composite range-list partitioning is used to range partition first, the divide the data in to subpartitions within each range partition based on the explicit list you chose. It combines both the ease of range partitioning and the benefits of list partitioning at the sub partition level.
Possible usage :- Range partition by date of birth then list partition by state.
Example
Create table sales_composite
(salesman_id number(5),
salesman_name varchar2(30),
sales_amount number(10),
sales_date date)
Partition by range (sales_date) subpartition by hash (salesman_id)
Subpartition template (
Subpartition sp1 tablespace data1,
Subpartition sp2 tablespace data2,
Subpartition sp3 tablespace data3,
Subpartition sp4 tablespace data4)
(partition sales_jan2009 values less
than (to_date (‘02/01/2009’,’dd/mm/yyyy’))
partition sales_feb2009 values less
than (to_date (‘03/01/2009’,’dd/mm/yyyy’))
partition sales_mar2009 values less
than (to_date (‘04/01/2009’,’dd/mm/yyyy’))
partition sales_apr2009 values less
than (to_date (‘05/01/2009’,’dd/mm/yyyy’))
partition sales_may2009 values less
than (to_date (‘06/01/2009’,’dd/mm/yyyy’))
enable row movement);
Create table bimonthly_regional_sales
(deptno number,
item_no varchar2(20),
txn_date date,
txn_amount number,
state varchar2(2))
Partition by Rnage (txn_date)
Subpartition by list (state)
Subpartition template (
Subpartition east values (‘NY’,’VA’,’FL’) tablespace ts1,
Subpartition west values (‘CA’,’OR’,’HI’) tablespace ts2,
Subpartition CENTRAL values (‘IL’,’TX’,’KS’) tablespace ts3
(Partition janfeb2009 values less than (to_date(‘1-MAR-2009’,’DD-MON-YYYY’)),
Partition marapr2009 values less than (to_date(‘1-MAY-2009’,’DD-MON-YYYY’)),
Partition mayjun2009 values less than (to_date(‘1-JU;-2009’,’DD-MON-YYYY’))
ENABLE ROW MOVEMENT);
Hash Partitioning
Hash Partitioning distributes data by applying a proprietary hashing algorith to the partition key and the assigning the data to the appropriate partition. With hash partitioning you can partition data that may not have any logical ranges. Oracle handles all of the distribution of date once the partition key is identified. Hash partitioning is used to spread data evenly over partitions.
Possible usage: Data has no logical groupings.
Example
Create table sales_hash
(salesman_id number(5),
salesman_name varchar2(30),
sales_amount number(10),
week_no number(2))
partition by hash (salesman_id)
partitions 4
store in (ts1, ts2, ts3, ts4);
In the next post I’ll talk about partitioned table maintenance activities and some guide lines.
Sunday, March 15, 2009
Table Partitioning in Oracle
In this section I’ll be discussing about the some types of partitioning options available in Oracle , its advantages and also provide some examples.
Why Partitioning?
Oracle partitioning is mainly used for manageability, availability and performance of oracle tables. Partitioning allows tables, indexes, materialized views and Index-organized tables to be further divided in to smaller manageable pieces. Partitioning enables the database objects to be managed and accessed at a finer level of granularity.
Partitioning for manageability
The partitioning option allows indexes and tables to be partitioned in to smaller manageable units. Using partition tables, DBA’s can perform maintenance on certain partitions while the rest of the partitions are still accessed by the applications.
A typical usage of partitioning for manageability is tos upport a “rolling window” load process in a data warehouse. Imagine you have to load a table with data on a monthly basis. You can take advantage of the range partition option so that each partition contains a months worth of data.
If you have to purge 6 month old data from a table on a monthly basis. The range partitioning offers a better solution. You can just delete a partition rather than issuing a DELETE command which creates additional load on the database.
Partitioning for Performance
By limiting the amount of data to be examined or operated on and by enabling parallel execution, the Oracle Partitioning option provides a number of performance benefits.
Partition Pruning
Partition pruning is the simplest and also the most substantial means to improve performance. Partition pruning can often improve query performance by several orders of magnitude.
Imagine a Orders table containing historical records of orders and the table data is partitioned by week. A query requesting data for a single week would only access a single partition of the orders table, thus by improving the performance by a bigger magnitude. Partition pruning works with all of Oracle’s other performance features. Oracle will utilize partition pruning in Conjunction with any indexing technique, join technique or parallel access method.
Partition Wise Joins
Partitioning can also improve the performance of multi-table joins, by using a technique known as partition-wise join. Partition-wise join can be applied with two tables being joined together and both of these tables are partitioned on the join key. Partition-wise joins breaks a large join in to smaller joins that occur between each of the partitions, completing the overall join in less time. This offers significant performance benefits both for serial and parallel execution.
Parallel Execution
Partitioning enables parallel execution of UPDATE, DELETE and MERGE statements. Oracle will parallelize SELECT statements and INSERT statements when accessing both partitioned and non-partitioned database objects. UPDATE, DELETE and MERGE statements can be parallelized for both partitioned and non-partitioned database objects when no bit map indexes are present. In order to parallelize the operations on objects having bit map indexes , the target table must be partitioned. Parallel execution of sql statements can vastly improve performance, particularly for UPADTE, DELETE or MERGE operations involving large volumes data.
Partitioning for Availability
The DBA can store different partitions in different tablespaces which would allow him/her to perform backup/recovery operations on each individual partition, independent of the other partitions in the table.
Partitioned database objects provide partition independence. If any one of the partitions become unavailable, all other partitions of the table remain online and available. Applications can still use the available partitions while the DBA can work on fixing the failed partition/partitions.
Types of Partitioning
· Range Partitioning
· Hash Partitioning
· List Partitioning
· Composite partitioning
In the next post, I’ll be discussing the above-mentioned partitioning options in detail.
Why Partitioning?
Oracle partitioning is mainly used for manageability, availability and performance of oracle tables. Partitioning allows tables, indexes, materialized views and Index-organized tables to be further divided in to smaller manageable pieces. Partitioning enables the database objects to be managed and accessed at a finer level of granularity.
Partitioning for manageability
The partitioning option allows indexes and tables to be partitioned in to smaller manageable units. Using partition tables, DBA’s can perform maintenance on certain partitions while the rest of the partitions are still accessed by the applications.
A typical usage of partitioning for manageability is tos upport a “rolling window” load process in a data warehouse. Imagine you have to load a table with data on a monthly basis. You can take advantage of the range partition option so that each partition contains a months worth of data.
If you have to purge 6 month old data from a table on a monthly basis. The range partitioning offers a better solution. You can just delete a partition rather than issuing a DELETE command which creates additional load on the database.
Partitioning for Performance
By limiting the amount of data to be examined or operated on and by enabling parallel execution, the Oracle Partitioning option provides a number of performance benefits.
Partition Pruning
Partition pruning is the simplest and also the most substantial means to improve performance. Partition pruning can often improve query performance by several orders of magnitude.
Imagine a Orders table containing historical records of orders and the table data is partitioned by week. A query requesting data for a single week would only access a single partition of the orders table, thus by improving the performance by a bigger magnitude. Partition pruning works with all of Oracle’s other performance features. Oracle will utilize partition pruning in Conjunction with any indexing technique, join technique or parallel access method.
Partition Wise Joins
Partitioning can also improve the performance of multi-table joins, by using a technique known as partition-wise join. Partition-wise join can be applied with two tables being joined together and both of these tables are partitioned on the join key. Partition-wise joins breaks a large join in to smaller joins that occur between each of the partitions, completing the overall join in less time. This offers significant performance benefits both for serial and parallel execution.
Parallel Execution
Partitioning enables parallel execution of UPDATE, DELETE and MERGE statements. Oracle will parallelize SELECT statements and INSERT statements when accessing both partitioned and non-partitioned database objects. UPDATE, DELETE and MERGE statements can be parallelized for both partitioned and non-partitioned database objects when no bit map indexes are present. In order to parallelize the operations on objects having bit map indexes , the target table must be partitioned. Parallel execution of sql statements can vastly improve performance, particularly for UPADTE, DELETE or MERGE operations involving large volumes data.
Partitioning for Availability
The DBA can store different partitions in different tablespaces which would allow him/her to perform backup/recovery operations on each individual partition, independent of the other partitions in the table.
Partitioned database objects provide partition independence. If any one of the partitions become unavailable, all other partitions of the table remain online and available. Applications can still use the available partitions while the DBA can work on fixing the failed partition/partitions.
Types of Partitioning
· Range Partitioning
· Hash Partitioning
· List Partitioning
· Composite partitioning
In the next post, I’ll be discussing the above-mentioned partitioning options in detail.
Thursday, March 12, 2009
Uni directional streams set up..
Oracle streams allows for back and forth repliaction between two active database servers.
Here I'll discuss the basic steps involved in setting up a streams replication in oracle 10g.
In the example provided I am setting up a upstream replication for table customer residing on binfo schema at source_db to binfo.customer at dest_db.
Init parameters
--------------------
certain initilalization parameters are required to be set at both source and destination instances before setting up streams.
Here are the parameters.
compatible - This parameter should be same on both sides.
Global_names = True --> Database links should match the global names.
Job_queue_process --> This parameter should be set to atleast 2(two).
Parallel_max_servers --> this parameter should be set to atleast 6 (six).
SGA_TARGET --> should be set .. else you need to set "streams_pool_size"
domain_name --> make sure this value is set.
Tns Names
-----------
Add Tnsnames entries for the source and destination databases on both sides.
Source_db = (DESCRIPTION = (ADDRESS_LIST = (ADDRESS = (PROTOCOL = TCP)(HOST = xx.xx.xx.xx)(PORT = 1521)) ) (CONNECT_DATA = (service_name = source_db) ) )
dest_db = (DESCRIPTION = (ADDRESS_LIST = (ADDRESS = (PROTOCOL = TCP)(HOST = xx.xx.xx.xx)(PORT = 1521)) ) (CONNECT_DATA = (service_name = dest_db) ) )
Create Tablespace
-----------------
Create separate tablespace for streams admin user objects on both sides.
create tablespace streams_ts datafile '/u01/oradata/sorce_db/streams_ts_001.dbf' size 250M;
and
create tablespace streams_ts datafile '/u01/oradata/dest_db/streams_ts_001.dbf' size 250M;
Create streams administrator user on both sides
------------------------------------------------
$> sqlplus / as sysdba
create user "STRMADMIN" identified by "xxxxxxx"
default tablespace streams_ts
temporary tablespace temp
quota unlimited on streams_ts;
Grant the following privs to strmsadmin user at the dest_db by looging in as sysdba
-----------------------------------------------------------------------------------
$> sqlplus / as sysdba
grant CONNECT, RESOURCE, AQ_ADMINISTRATOR_ROLE to "STRMADMIN"; GRANT DBA TO STRMADMIN; GRANT EXECUTE ON sys.dbms_aq TO STRMADMIN; GRANT EXECUTE ON sys.dbms_aqadm TO STRMADMIN;
BEGIN
DBMS_AQADM.GRANT_SYSTEM_PRIVILEGE
(
privilege => 'ENQUEUE_ANY',
grantee => 'STRMADMIN',
admin_option => FALSE
);
END;
/
BEGIN
DBMS_AQADM.GRANT_SYSTEM_PRIVILEGE
(
privilege => 'DEQUEUE_ANY',
grantee => 'STRMADMIN',
admin_option => FALSE
);
END;
/
BEGIN
DBMS_AQADM.GRANT_SYSTEM_PRIVILEGE
(
privilege => 'MANAGE_ANY',
grantee => 'STRMADMIN',
admin_option => TRUE
);
END;
/
BEGIN
DBMS_AQADM.GRANT_TYPE_ACCESS
(
user_name => 'STRMADMIN'
);
END;
/
BEGIN
DBMS_RULE_ADM.GRANT_SYSTEM_PRIVILEGE
(
privilege => DBMS_RULE_ADM.CREATE_EVALUATION_CONTEXT_OBJ,
grantee => 'STRMADMIN',
grant_option => TRUE);
DBMS_RULE_ADM.GRANT_SYSTEM_PRIVILEGE
(
privilege => DBMS_RULE_ADM.CREATE_RULE_SET_OBJ,
grantee => 'STRMADMIN',
grant_option => TRUE);
DBMS_RULE_ADM.GRANT_SYSTEM_PRIVILEGE
(
privilege => DBMS_RULE_ADM.CREATE_RULE_OBJ,
grantee => 'STRMADMIN',
grant_option => TRUE
);
END;
/
BEGIN
DBMS_RULE_ADM.GRANT_SYSTEM_PRIVILEGE
(
privilege => DBMS_RULE_ADM.CREATE_ANY_RULE_SET,
grantee => 'STRMADMIN',
grant_option => TRUE);
DBMS_RULE_ADM.GRANT_SYSTEM_PRIVILEGE
(
privilege => DBMS_RULE_ADM.ALTER_ANY_RULE_SET,
grantee => 'STRMADMIN',
grant_option => TRUE);
DBMS_RULE_ADM.GRANT_SYSTEM_PRIVILEGE
(
privilege => DBMS_RULE_ADM.EXECUTE_ANY_RULE_SET,
grantee => 'STRMADMIN',
grant_option => TRUE);
DBMS_RULE_ADM.GRANT_SYSTEM_PRIVILEGE
(
privilege => DBMS_RULE_ADM.CREATE_ANY_RULE,
grantee => 'STRMADMIN',
grant_option => TRUE);
DBMS_RULE_ADM.GRANT_SYSTEM_PRIVILEGE
(
privilege => DBMS_RULE_ADM.ALTER_ANY_RULE,
grantee => 'STRMADMIN',
grant_option => TRUE);
DBMS_RULE_ADM.GRANT_SYSTEM_PRIVILEGE
(
privilege => DBMS_RULE_ADM.EXECUTE_ANY_RULE,
grantee => 'STRMADMIN',
grant_option => TRUE
);
END;
/
BEGIN
DBMS_RULE_ADM.GRANT_OBJECT_PRIVILEGE
(
privilege => DBMS_RULE_ADM.EXECUTE_ON_EVALUATION_CONTEXT, object_name => 'SYS.STREAMS$_EVALUATION_CONTEXT',
grantee => 'STRMADMIN',
grant_option => FALSE
);
END;
/
GRANT EXECUTE ON sys.dbms_capture_adm TO STRMADMIN; GRANT EXECUTE ON sys.dbms_apply_adm TO STRMADMIN; GRANT EXECUTE ON sys.dbms_rule_adm TO STRMADMIN;GRANT SELECT_CATALOG_ROLE TO STRMADMIN;
BEGIN
DBMS_RULE_ADM.GRANT_SYSTEM_PRIVILEGE
(
privilege => DBMS_RULE_ADM.EXECUTE_ANY_EVALUATION_CONTEXT, grantee => 'STRMADMIN',
grant_option => TRUE
);
END;
/
GRANT EXECUTE ON SYS.dbms_streams_adm TO STRMADMIN; GRANT ALL PRIVILEGES TO STRMADMIN;
Create application user(schema) on both sides
------------------------------------------------------
create user binfo identified by binfo
default tablespace binfo_data
temporary tablespace temp
quota unlimited on binfo_data;
grant connect, dba to binfo_data;
Connect to Binfo at source_db
---------------------------------------
create table customer
( cust_id number(10) not null,
cust_Fn varchar2(20) not null,
cust_Ln Varchar2(20) not null,
Addr Varchar2 (50),
state varchar2(2));
alter table customer add constraint customer_pk primary key (cust_id);
Connect to strmadmin at the remote_db
--------------------------------------------------
$> sqlplus strmadmin/
Create streams queue
BEGIN
DBMS_STREAMS_ADM.SET_UP_QUEUE( queue_user => 'STRMADMIN');
END;
/
Add apply rules for tables at the destination database
-------------------------------------------------------------
BEGIN
DBMS_STREAMS_ADM.ADD_TABLE_RULES
( table_name => '"BINFO"."CUSTOMER"',
streams_type => 'APPLY',
streams_name => 'STRMADMIN_SOURCE_DB_',
queue_name => '"STRMADMIN"."STREAMS_QUEUE"',
include_dml => true,
include_ddl => true,
source_database => 'SOURCE_DB.XXX.COM');
END;
/
Connect to sysdba at the source database
-------------------------------------------------------
Enable supplemental logging at table level (optional) Supplemental logging helps capture additional information to redologs for row identification
alter table binfo.customer add supplemental log group cust_loggrp (cust_id, cust_fn, cust_ln);
Switch log file
sqlplus> ALTER SYSTEM SWITCH LOGFILE;
Grant the required privileges to strmadmin user
--------------------------------------------------------------
grant CONNECT, RESOURCE, AQ_ADMINISTRATOR_ROLE to "STRMADMIN";
GRANT DBA TO STRMADMIN;GRANT EXECUTE ON sys.dbms_aq TO STRMADMIN;
GRANT EXECUTE ON sys.dbms_aqadm TO STRMADMIN;
BEGIN
DBMS_AQADM.GRANT_SYSTEM_PRIVILEGE
( privilege => 'ENQUEUE_ANY',
grantee => 'STRMADMIN',
admin_option => FALSE);
END;
/
BEGIN
DBMS_AQADM.GRANT_SYSTEM_PRIVILEGE
( privilege => 'DEQUEUE_ANY',
grantee => 'STRMADMIN',
admin_option => FALSE);
END;
/
BEGIN
DBMS_AQADM.GRANT_SYSTEM_PRIVILEGE
( privilege => 'MANAGE_ANY',
grantee => 'STRMADMIN',
admin_option => TRUE);
END;
/
BEGIN
DBMS_AQADM.GRANT_TYPE_ACCESS
( user_name => 'STRMADMIN');
END;
/
BEGIN
DBMS_RULE_ADM.GRANT_SYSTEM_PRIVILEGE
( privilege => DBMS_RULE_ADM.CREATE_EVALUATION_CONTEXT_OBJ,
grantee => 'STRMADMIN',
grant_option => TRUE)
;
DBMS_RULE_ADM.GRANT_SYSTEM_PRIVILEGE
( privilege => DBMS_RULE_ADM.CREATE_RULE_SET_OBJ,
grantee => 'STRMADMIN',
grant_option => TRUE);
DBMS_RULE_ADM.GRANT_SYSTEM_PRIVILEGE
( privilege => DBMS_RULE_ADM.CREATE_RULE_OBJ,
grantee => 'STRMADMIN',
grant_option => TRUE);
END;
/
BEGIN
DBMS_RULE_ADM.GRANT_SYSTEM_PRIVILEGE
( privilege => DBMS_RULE_ADM.CREATE_ANY_RULE_SET,
grantee => 'STRMADMIN',
grant_option => TRUE);
DBMS_RULE_ADM.GRANT_SYSTEM_PRIVILEGE
( privilege => DBMS_RULE_ADM.ALTER_ANY_RULE_SET,
grantee => 'STRMADMIN',
grant_option => TRUE);
DBMS_RULE_ADM.GRANT_SYSTEM_PRIVILEGE
( privilege => DBMS_RULE_ADM.EXECUTE_ANY_RULE_SET,
grantee => 'STRMADMIN',
grant_option => TRUE);
DBMS_RULE_ADM.GRANT_SYSTEM_PRIVILEGE
( privilege => DBMS_RULE_ADM.CREATE_ANY_RULE,
grantee => 'STRMADMIN',
grant_option => TRUE);
DBMS_RULE_ADM.GRANT_SYSTEM_PRIVILEGE
( privilege => DBMS_RULE_ADM.ALTER_ANY_RULE,
grantee => 'STRMADMIN',
grant_option => TRUE);
DBMS_RULE_ADM.GRANT_SYSTEM_PRIVILEGE
( privilege => DBMS_RULE_ADM.EXECUTE_ANY_RULE,
grantee => 'STRMADMIN',
grant_option => TRUE);
END;
/
BEGIN
DBMS_RULE_ADM.GRANT_OBJECT_PRIVILEGE
( privilege => DBMS_RULE_ADM.EXECUTE_ON_EVALUATION_CONTEXT,
object_name => 'SYS.STREAMS$_EVALUATION_CONTEXT',
grantee => 'STRMADMIN',
grant_option => FALSE );
END;
/
GRANT EXECUTE ON sys.dbms_capture_adm TO STRMADMIN;GRANT EXECUTE ON sys.dbms_apply_adm TO STRMADMIN;GRANT EXECUTE ON sys.dbms_rule_adm TO STRMADMIN;GRANT SELECT_CATALOG_ROLE TO STRMADMIN;
BEGIN
DBMS_RULE_ADM.GRANT_SYSTEM_PRIVILEGE
( privilege => DBMS_RULE_ADM.EXECUTE_ANY_EVALUATION_CONTEXT,
grantee => 'STRMADMIN',
grant_option => TRUE);
END;
/
GRANT EXECUTE ON SYS.dbms_streams_adm TO STRMADMIN;
GRANT ALL PRIVILEGES TO STRMADMIN;
Connect to strmadmin at source_db
----------------------------------------------
Create a database link
CREATE DATABASE LINK
"dest_db.xxx.COM" connect to "STRMADMIN" identified by "STRMADMIN" using '(DESCRIPTION=(ADDRESS_LIST=(ADDRESS=(PROTOCOL=TCP)(HOST=xxx.xxx.xxx.xx)(PORT=1521)))(CONNECT_DATA=(SERVICE_NAME=dest_db.xx.com)))';
Create streams queue
BEGIN
DBMS_STREAMS_ADM.SET_UP_QUEUE
( queue_user => 'STRMADMIN');
END;
/
Add capture rules for tables at the source site
-------------------------------------------------------
BEGIN
DBMS_STREAMS_ADM.ADD_TABLE_RULES
( table_name => '"BINFO"."CUSTOMER"',
streams_type => 'CAPTURE',
streams_name => 'STRMADMIN_CAPTURE',
queue_name => '"STRMADMIN"."STREAMS_QUEUE"',
include_dml => true,
include_ddl => true,
source_database => 'SOURCE_DB.XX.COM');
END;
/
Add propagation rules for tables at the source database
BEGIN
DBMS_STREAMS_ADM.ADD_TABLE_PROPAGATION_RULES
( table_name => '"BINFO"."CUSTOMER"',
streams_name => 'STRMADMIN_PROPAGATE',
source_queue_name => '"STRMADMIN"."STREAMS_QUEUE"',
destination_queue_name => '"STRMADMIN"."STREAMS_QUEUE"@SOURCE_DBxx.COM',
include_dml => true,
include_ddl => true,
source_database => 'source_db.xx.COM');
END;
/
Export the table from source_db and import them in to dest_db.
--------------------------------------------------------------------------------
Here you will instantiate the scn at dest_db along with import. You can use data pump as well.
exp USERID="STRMADMIN"@source_db TABLES="binfo"."customer" FILE=tables.dmp GRANTS=Y ROWS=N LOG=exportTables.log OBJECT_CONSISTENT=Y INDEXES=Y
imp USERID="STRMADMIN"@dest_db FULL=Y CONSTRAINTS=Y FILE=tables.dmp IGNORE=Y GRANTS=Y ROWS=N COMMIT=Y LOG=importTables.log STREAMS_CONFIGURATION=N STREAMS_INSTANTIATION=Y
Startup operations
----------------------------
You are pretty much done with the set up at this point .you need to start the capture and apply process.
connect to strmadmin@dest_db and start the apply process first
DECLARE v_started number;
BEGIN
SELECT decode
(status, 'ENABLED', 1, 0) INTO v_started FROM DBA_APPLY WHERE APPLY_NAME = 'STRMADMIN_source_db_'; if (v_started = 0) then
DBMS_APPLY_ADM.START_APPLY(apply_name => 'STRMADMIN_source_db_');
end if;
END;
/
Connect to strmadmin at the source database and start the capture process
-------------------------------------------------------------------------------------------
DECLARE
v_started number;
BEGIN
SELECT decode(status, 'ENABLED', 1, 0) INTO v_started FROM DBA_CAPTURE WHERE CAPTURE_NAME = 'STRMADMIN_CAPTURE';
if (v_started = 0) then
DBMS_CAPTURE_ADM.START_CAPTURE(capture_name => 'STRMADMIN_CAPTURE');
end if;
END;
/
Now test the replication.
-------------------------------
Insert some values in to the source table and see if its getting replicated.
I'll discuss more about streams troubleshooting in Future posts.
Sunday, February 22, 2009
Building the 10g rac Database
Once you have successfully installed Oracle 10g binaries and CRS. Its time to build the database. This is not a complicated task for a DBA who has built oracle instances and databases. There are few RCA specific parameters that need to be added to the init.ora file. I'll not cover this topic in detail, but will provide enough information to build a new database.
1) The first task is to create the initialization file. I'll list the init parameters that are requuired for RAC.
db_name =
instance_name =
instance_number = 1
cluster_database_instances = 2local_listener = '(address=(protocol=tcp)(host=hostname)(port=1521))
cluster_database = true
thread = 1
2) I use DBCA to generate scripts to build the database. If you already have the scripts to build the database, you could use that as well.
3) Make sure the "cluster_database" parameter is set to "false" before building the database else the create database command will fail.
4) Create the database as you would create a non-RAC database.
5) Make sure you execute the script "$ORACLE_HOME/rdbms/admin/catclust.sql" after executing the create catalog scripts.
6) The next job is to create additional undo segments for other instances on the RAC cluster.Please add the corresponding undo tablespace name in the respective init.ora for instances.
create undo tablespace UNDO02 datafile size 10240m reuse autoextend off;
7) Create additional redo thread for other instances in the RAC cluster.
alter database add logfile thread 2
group 21 (‘//RD21.rdo’) size
…
1024m reuse;
alter database enable thread 2;
8) Shutdown the first instance.
sqlplus > shutdown immediate
9) Edit the init file and set "cluster_database to true"
startup the first instance.
10) Copy the initfile from the primary node and create initfile for second instance.
Make sure you edited the following parameters.
Thread = 2
instance_name =
instance_number = 2
local_listener = '(address=(protocol=tcp)(host=hostname)(port=1521))'
undo_tablespace = UNDO02
11) startup the second instance.
sqlplus> startup
12) verify both the databases are up and running from any node.
sqlplus> select * from gv$instance;
The query result should dsiplay all the instances you created for the RAC database.
13)Add database to CRS using "srvctl" commands.
$srvctl add database -d-o $ORACLE_HOME -y manual
$srvctl add instance -d-i -n
$srvctl add instance -d-i -n
14) if everything goes well, the crs_stat -t command should list the database and instances.
$ crs_stat -t
Name Type Target State Host
------------------------------------------------------------
ora....re2.gsd application ONLINE ONLINE nodeA
ora....re2.ons application ONLINE ONLINE nodeA
ora....re2.vip application ONLINE ONLINE nodeA
ora.fvdev1.db application ONLINE ONLINE nodeA
ora....11.inst application ONLINE ONLINE nodeA
ora....12.inst application ONLINE ONLINE nodeB
ora....b02.gsd application ONLINE ONLINE nodeB
ora....b02.ons application ONLINE ONLINE nodeB
ora....b02.vip application ONLINE ONLINE nodeB
Next step is creating Listeners for RAC
--------------------------------------
1) Set the TNS_ADMIN variable in CRS.
$srvctl setenv nodeapps -n-t TNS_ADMIN=
$srvctl setenv nodeapps -n-t TNS_ADMIN=
2) Start netca from any one node after setting the "DISPLAY" variable.
$netca
3) select Cluster configuration and hit next.


1) The first task is to create the initialization file. I'll list the init parameters that are requuired for RAC.
db_name =
instance_name =
instance_number = 1
cluster_database_instances = 2local_listener = '(address=(protocol=tcp)(host=hostname)(port=1521))
cluster_database = true
thread = 1
2) I use DBCA to generate scripts to build the database. If you already have the scripts to build the database, you could use that as well.
3) Make sure the "cluster_database" parameter is set to "false" before building the database else the create database command will fail.
4) Create the database as you would create a non-RAC database.
5) Make sure you execute the script "$ORACLE_HOME/rdbms/admin/catclust.sql" after executing the create catalog scripts.
6) The next job is to create additional undo segments for other instances on the RAC cluster.Please add the corresponding undo tablespace name in the respective init.ora for instances.
create undo tablespace UNDO02 datafile size 10240m reuse autoextend off;
7) Create additional redo thread for other instances in the RAC cluster.
alter database add logfile thread 2
group 21 (‘/
…
1024m reuse;
alter database enable thread 2;
8) Shutdown the first instance.
sqlplus > shutdown immediate
9) Edit the init file and set "cluster_database to true"
startup the first instance.
10) Copy the initfile from the primary node and create initfile for second instance.
Make sure you edited the following parameters.
Thread = 2
instance_name =
instance_number = 2
local_listener = '(address=(protocol=tcp)(host=hostname)(port=1521))'
undo_tablespace = UNDO02
11) startup the second instance.
sqlplus> startup
12) verify both the databases are up and running from any node.
sqlplus> select * from gv$instance;
The query result should dsiplay all the instances you created for the RAC database.
13)Add database to CRS using "srvctl" commands.
$srvctl add database -d
$srvctl add instance -d
$srvctl add instance -d
14) if everything goes well, the crs_stat -t command should list the database and instances.
$ crs_stat -t
Name Type Target State Host
------------------------------------------------------------
ora....re2.gsd application ONLINE ONLINE nodeA
ora....re2.ons application ONLINE ONLINE nodeA
ora....re2.vip application ONLINE ONLINE nodeA
ora.fvdev1.db application ONLINE ONLINE nodeA
ora....11.inst application ONLINE ONLINE nodeA
ora....12.inst application ONLINE ONLINE nodeB
ora....b02.gsd application ONLINE ONLINE nodeB
ora....b02.ons application ONLINE ONLINE nodeB
ora....b02.vip application ONLINE ONLINE nodeB
Next step is creating Listeners for RAC
--------------------------------------
1) Set the TNS_ADMIN variable in CRS.
$srvctl setenv nodeapps -n
$srvctl setenv nodeapps -n
2) Start netca from any one node after setting the "DISPLAY" variable.
$netca
3) select Cluster configuration and hit next.

4) select both the nodes to configure.

5) select listener configuration and add listener.
6) select the default listener name.

7) Select protocol "tcp" and port 1521 on the next screen.

8)sample content of the listener.ora file.
SID_LIST_LISTENER_name =
(SID_LIST =
(SID_DESC =
(SID_NAME = PLSExtProc)
(ORACLE_HOME = /u01/app/oracle/product/10.2.0)
(PROGRAM = extproc)
)
)
LISTENER_name =
(DESCRIPTION_LIST =
(DESCRIPTION =
(ADDRESS = (PROTOCOL = TCP)(HOST = hostname)(PORT = 1521)(IP = FIRST))
(ADDRESS = (PROTOCOL = TCP)(HOST = xx.xx.xx.xx)(PORT = 1521)(IP = FIRST))
)
)
(SID_LIST =
(SID_DESC =
(SID_NAME = PLSExtProc)
(ORACLE_HOME = /u01/app/oracle/product/10.2.0)
(PROGRAM = extproc)
)
)
LISTENER_name =
(DESCRIPTION_LIST =
(DESCRIPTION =
(ADDRESS = (PROTOCOL = TCP)(HOST = hostname)(PORT = 1521)(IP = FIRST))
(ADDRESS = (PROTOCOL = TCP)(HOST = xx.xx.xx.xx)(PORT = 1521)(IP = FIRST))
)
)
9) set up client side TAF by adding TAF tnsnames entry into tnsnames.ora file of the Oracle clients.
e.g.
name =
(DESCRIPTION =
(load_balance = off) --> you can set it to on if you choose
(failover = on)
(ADDRESS = (PROTOCOL = TCP)(HOST = nodea)(PORT = 1521))
(ADDRESS = (PROTOCOL = TCP)(HOST = nodeb)(PORT = 1521))
(CONNECT_DATA =
(DESCRIPTION =
(load_balance = off) --> you can set it to on if you choose
(failover = on)
(ADDRESS = (PROTOCOL = TCP)(HOST = nodea)(PORT = 1521))
(ADDRESS = (PROTOCOL = TCP)(HOST = nodeb)(PORT = 1521))
(CONNECT_DATA =
(SERVICE_NAME = db_name)
(failover_mode =
(type = select)
(method = basic)
(retries = 5)
(delay = 1)
)
)
)
(failover_mode =
(type = select)
(method = basic)
(retries = 5)
(delay = 1)
)
)
)
Validation
----------
Try the following commands.
1) crs_stop -all
2) crs_start -all
3)crs_stat -t
4)srvctl start/stop database –d $DB_NAME
5)srvctl start/stop instance –d $DB_NAME –i $INSTANCE_NAME
6) srvctl start/stop nodeapps –n $node
Back up the vote disk on both nodes. This step needs to be run any time after a new node is added or an existing node is removed.
$ cp /u01/app/oracle/dbdata/vote/vote_file /u01/app/oracle/cluster/crs/backup/crs/vote_file.`date +%y%m%d`
$verify all components are ONLINE using "crs_stat -t"
Name Type Target State Host
------------------------------------------------------------
ora....E2.lsnr application ONLINE ONLINE nodeA
ora....re2.gsd application ONLINE ONLINE nodeA
ora....re2.ons application ONLINE ONLINE nodeA
ora....re2.vip application ONLINE ONLINE nodeA
ora.fvdev1.db application ONLINE ONLINE nodeA
ora....11.inst application ONLINE ONLINE nodeA
ora....12.inst application ONLINE ONLINE nodeB
ora....02.lsnr application ONLINE ONLINE nodeB
ora....b02.gsd application ONLINE ONLINE nodeB
ora....b02.ons application ONLINE ONLINE nodeB
ora....b02.vip application ONLINE ONLINE nodeB
Saturday, February 21, 2009
Patching RDBMS binaries for Oracle 10g R2
Patching RDBMS binaries is pretty straight forward. I'll not be pasting any screen shots, but explain the steps required.
1) DBA sets the Oracle home to RDBMS home directory.
2) Execute "runInstaller" from staging area.
3) Validate the Oracle_home and hit next.
4) The installer automatically picks the cluster installation, if "/etc/oraInst.loc or /var/opt/oracle/oraInst.loc (in solaris) " is pointing to CRS_HOME.
hit next
5) Verify the summary and hit Install.
6) Excute "root.sh" on all nodes in the cluster and then exit OUI.
1) DBA sets the Oracle home to RDBMS home directory.
2) Execute "runInstaller" from staging area.
3) Validate the Oracle_home and hit next.
4) The installer automatically picks the cluster installation, if "/etc/oraInst.loc or /var/opt/oracle/oraInst.loc (in solaris) " is pointing to CRS_HOME.
hit next
5) Verify the summary and hit Install.
6) Excute "root.sh" on all nodes in the cluster and then exit OUI.
Installing 10G R2 binaries in Oracle RAC environment.
Once you have successfully installed CRS, The Oracle 10gR2 binary installation is relatively easy.
1) DBA sets the ORACLE_HOME for the RDBMS binary and the verify the environment variables.
$> . oarenv
$> env grep -i oracle
2) Execute "runInstaller" from the staging area and select the custom installation.




1) DBA sets the ORACLE_HOME for the RDBMS binary and the verify the environment variables.
$> . oarenv
$> env grep -i oracle
2) Execute "runInstaller" from the staging area and select the custom installation.

3) Specify the Oracle_home details and hit next
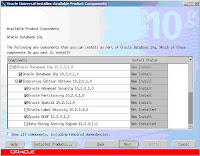
4) specify cluster installation and check all nodes on the cluster.

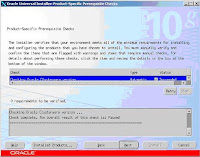
5) Specify the required components for installation.

6) Make sure that the prerequisite checks have no errors.

7) Provide the "dba" group name.

8) Select "Install software only "(I prefer to build the database later).

9) Review the summary screen and hit continue.
10) execute "root.sh" on both nodes from the location displayed on the GUI.

$rootsh=/path/to/root.sh
The following environment variables are set as:
ORACLE_OWNER= oracle
ORACLE_HOME= /u01/app/oracle/product/10.2.0
Enter the full pathname of the local bin directory: [/usr/local/bin]: ..
Entries will be added to the /var/opt/oracle/oratab file as needed by
Database Configuration Assistant when a database is created
Finished running generic part of root.sh script.
Now product-specific root actions will be performed.
The following environment variables are set as:
ORACLE_OWNER= oracle
ORACLE_HOME= /u01/app/oracle/product/10.2.0
Enter the full pathname of the local bin directory: [/usr/local/bin]: ..
Entries will be added to the /var/opt/oracle/oratab file as needed by
Database Configuration Assistant when a database is created
Finished running generic part of root.sh script.
Now product-specific root actions will be performed.
11) Hit O.K. and exit the GUI.
Subscribe to:
Posts (Atom)


