Sunday, February 22, 2009

Building the 10g rac Database

Once you have successfully installed Oracle 10g binaries and CRS. Its time to build the database. This is not a complicated task for a DBA who has built oracle instances and databases. There are few RCA specific parameters that need to be added to the init.ora file. I'll not cover this topic in detail, but will provide enough information to build a new database.
1) The first task is to create the initialization file. I'll list the init parameters that are requuired for RAC.
db_name =
instance_name =
instance_number = 1
cluster_database_instances = 2local_listener = '(address=(protocol=tcp)(host=hostname)(port=1521))
cluster_database = true
thread = 1
2) I use DBCA to generate scripts to build the database. If you already have the scripts to build the database, you could use that as well.
3) Make sure the "cluster_database" parameter is set to "false" before building the database else the create database command will fail.
4) Create the database as you would create a non-RAC database.
5) Make sure you execute the script "$ORACLE_HOME/rdbms/admin/catclust.sql" after executing the create catalog scripts.
6) The next job is to create additional undo segments for other instances on the RAC cluster.Please add the corresponding undo tablespace name in the respective init.ora for instances.
create undo tablespace UNDO02 datafile size 10240m reuse autoextend off;
7) Create additional redo thread for other instances in the RAC cluster.
alter database add logfile thread 2
group 21 (‘//RD21.rdo’) size

1024m reuse;
alter database enable thread 2;
8) Shutdown the first instance.
sqlplus > shutdown immediate
9) Edit the init file and set "cluster_database to true"
startup the first instance.
10) Copy the initfile from the primary node and create initfile for second instance.
Make sure you edited the following parameters.
Thread = 2
instance_name =
instance_number = 2
local_listener = '(address=(protocol=tcp)(host=hostname)(port=1521))'
undo_tablespace = UNDO02
11) startup the second instance.
sqlplus> startup
12) verify both the databases are up and running from any node.
sqlplus> select * from gv$instance;
The query result should dsiplay all the instances you created for the RAC database.
13)Add database to CRS using "srvctl" commands.
$srvctl add database -d -o $ORACLE_HOME -y manual
$srvctl add instance -d -i -n
14) if everything goes well, the crs_stat -t command should list the database and instances.
$ crs_stat -t
Name Type Target State Host
------------------------------------------------------------
ora....re2.gsd application ONLINE ONLINE nodeA
ora....re2.ons application ONLINE ONLINE nodeA
ora....re2.vip application ONLINE ONLINE nodeA
ora.fvdev1.db application ONLINE ONLINE nodeA
ora....11.inst application ONLINE ONLINE nodeA
ora....12.inst application ONLINE ONLINE nodeB
ora....b02.gsd application ONLINE ONLINE nodeB
ora....b02.ons application ONLINE ONLINE nodeB
ora....b02.vip application ONLINE ONLINE nodeB

Next step is creating Listeners for RAC
--------------------------------------
1) Set the TNS_ADMIN variable in CRS.
$srvctl setenv nodeapps -n -t TNS_ADMIN=
2) Start netca from any one node after setting the "DISPLAY" variable.
$netca
3) select Cluster configuration and hit next.


4) select both the nodes to configure.

5) select listener configuration and add listener.
6) select the default listener name.

7) Select protocol "tcp" and port 1521 on the next screen.

8)sample content of the listener.ora file.
SID_LIST_LISTENER_name =
(SID_LIST =
(SID_DESC =
(SID_NAME = PLSExtProc)
(ORACLE_HOME = /u01/app/oracle/product/10.2.0)
(PROGRAM = extproc)
)
)

LISTENER_name =
(DESCRIPTION_LIST =
(DESCRIPTION =
(ADDRESS = (PROTOCOL = TCP)(HOST = hostname)(PORT = 1521)(IP = FIRST))
(ADDRESS = (PROTOCOL = TCP)(HOST = xx.xx.xx.xx)(PORT = 1521)(IP = FIRST))
)
)
9) set up client side TAF by adding TAF tnsnames entry into tnsnames.ora file of the Oracle clients.
e.g.
name =
(DESCRIPTION =
(load_balance = off) --> you can set it to on if you choose
(failover = on)
(ADDRESS = (PROTOCOL = TCP)(HOST = nodea)(PORT = 1521))
(ADDRESS = (PROTOCOL = TCP)(HOST = nodeb)(PORT = 1521))
(CONNECT_DATA =
(SERVICE_NAME = db_name)
(failover_mode =
(type = select)
(method = basic)
(retries = 5)
(delay = 1)
)
)
)
Validation
----------
Try the following commands.
1) crs_stop -all
2) crs_start -all
3)crs_stat -t
4)srvctl start/stop database –d $DB_NAME
5)srvctl start/stop instance –d $DB_NAME –i $INSTANCE_NAME
6) srvctl start/stop nodeapps –n $node
Back up the vote disk on both nodes. This step needs to be run any time after a new node is added or an existing node is removed.
$ cp /u01/app/oracle/dbdata/vote/vote_file /u01/app/oracle/cluster/crs/backup/crs/vote_file.`date +%y%m%d`
$verify all components are ONLINE using "crs_stat -t"
Name Type Target State Host
------------------------------------------------------------
ora....E2.lsnr application ONLINE ONLINE nodeA
ora....re2.gsd application ONLINE ONLINE nodeA
ora....re2.ons application ONLINE ONLINE nodeA
ora....re2.vip application ONLINE ONLINE nodeA
ora.fvdev1.db application ONLINE ONLINE nodeA
ora....11.inst application ONLINE ONLINE nodeA
ora....12.inst application ONLINE ONLINE nodeB
ora....02.lsnr application ONLINE ONLINE nodeB
ora....b02.gsd application ONLINE ONLINE nodeB
ora....b02.ons application ONLINE ONLINE nodeB
ora....b02.vip application ONLINE ONLINE nodeB

Saturday, February 21, 2009

Patching RDBMS binaries for Oracle 10g R2

Patching RDBMS binaries is pretty straight forward. I'll not be pasting any screen shots, but explain the steps required.

1) DBA sets the Oracle home to RDBMS home directory.

2) Execute "runInstaller" from staging area.

3) Validate the Oracle_home and hit next.

4) The installer automatically picks the cluster installation, if "/etc/oraInst.loc or /var/opt/oracle/oraInst.loc (in solaris) " is pointing to CRS_HOME.
hit next

5) Verify the summary and hit Install.

6) Excute "root.sh" on all nodes in the cluster and then exit OUI.

Installing 10G R2 binaries in Oracle RAC environment.

Once you have successfully installed CRS, The Oracle 10gR2 binary installation is relatively easy.
1) DBA sets the ORACLE_HOME for the RDBMS binary and the verify the environment variables.
$> . oarenv
$> env grep -i oracle
2) Execute "runInstaller" from the staging area and select the custom installation.


3) Specify the Oracle_home details and hit next
4) specify cluster installation and check all nodes on the cluster.

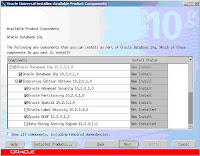
5) Specify the required components for installation.

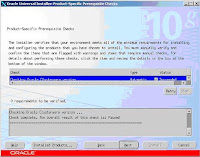
6) Make sure that the prerequisite checks have no errors.

7) Provide the "dba" group name.

8) Select "Install software only "(I prefer to build the database later).

9) Review the summary screen and hit continue.
10) execute "root.sh" on both nodes from the location displayed on the GUI.

$rootsh=/path/to/root.sh

The following environment variables are set as:
ORACLE_OWNER= oracle
ORACLE_HOME= /u01/app/oracle/product/10.2.0

Enter the full pathname of the local bin directory: [/usr/local/bin]: ..

Entries will be added to the /var/opt/oracle/oratab file as needed by
Database Configuration Assistant when a database is created
Finished running generic part of root.sh script.
Now product-specific root actions will be performed.
11) Hit O.K. and exit the GUI.

Oracle CRS 10.2.0.4 patching..

It has been a while, I have posted something on my blog. I hate my blog to look like a ghost town. I'll discuss the Oracle 10.2.0.4 patching proceess here.
I used to install Oracle 10g r2 base binaries right after installing Oracle CRS. I was hit by a OCR corruption issue which created lot of core dumps and was forced to rebuilt my OCR files. The avoid any such issue, I would suggest Patch oracle CRS first and the install RDBMS software.
1) The first step to apply 10.2.0.4 patch to CRS is to shutdwon CRS on both nodes.
Usually the "root" user will have the privileges to shitdown the CRS. The SA or root user can shutdown crs using the command
$> crsctl stop crs or
$/etc/init.d/init.crs stop
Make sure CRS is shut down.
$ps -ef grep crs
root 968 1 0 12:11:45 ? 0:00 /bin/sh /etc/init.d/init.crsd run
2) Make sure you change the ownership of "VIPCA" back to "oracle" from "root".
3) Set the environment varaiable for "crs".
$> ./.oraenv crs
check the oracle_home variable is to CRS_HOME.
env grep ORACLE_HOME
4) cd to the 10.2.0.4 patch set directory and execute "runInstaller". The crs and rdbms use the same 10.20.4 patset(there is no seperate 10204 patch set for CRS).


5) DBA confirms the CRSHOME and hit next

6) DBA confirms the node names in cluster and hit next


7) Validate the summary page and start installation.

8) At the end of the installation, Pl execute the root102.sh on all the nodes as instructed in the GUI.

9)log in as root and execute on all nodes one by one. you canignore the warnings below.

$/u01/app/oracle/cluster/crs/install/root102.shCreating pre-patch directory for saving pre-patch clusterware filesCompleted patching clusterware files to /u01/app/oracle/cluster/crsRelinking some shared libraries.ar: writing /u01/app/oracle/cluster/crs/lib/libn10.aar: writing /u01/app/oracle/cluster/crs/lib32/libn10.aar: writing /u01/app/oracle/cluster/crs/lib/libn10.aRelinking of patched files is complete.WARNING: directory '/u01/app/oracle/cluster' is not owned by rootWARNING: directory '/u01/app/oracle' is not owned by rootPreparing to recopy patched init and RC scripts.Recopying init and RC scripts.Startup will be queued to init within 30 seconds.Starting up the CRS daemons.Waiting for the patched CRS daemons to start. This may take a while on some systems..10204 patch successfully applied.clscfg: EXISTING configuration version 3 detected.clscfg: version 4 is 10G Release 2.Successfully accumulated necessary OCR keys.Using ports: CSS=32845 CRS=45632 EVMC=43567 and EVMR=34834.node : node 0: nodeA nodea-priv1 nodeBCreating OCR keys for user 'root', privgrp 'dba'..Operation successful.clscfg -upgrade completed successfully

10) Check CRS by issueing crs_stat -t and exit OUI.

$>crs_stat -t

Name Type Target State Host

-----------------------------

ora.node1.gsd application ONLINE ONLINE node1

ora.node1.ons application ONLINE ONLINE node1

ora.node1.vip application ONLINE ONLINE node1

ora.node2.gsd application ONLINE ONLINE node2

ora.node2.ons application ONLINE ONLINE node2

ora.node2.vip application ONLINE ONLINE node2